Transforming a house into a home often involves the personal touch of hanging picture frames, whether it’s a cherished family photo, a motivational poster, or a collection of wall art pieces. Yet, for many, the task of hanging a picture frame can seem daunting, especially when accidental mistakes can lead to holes and damage to your wall. However, with our help, you can ensure your pictures are displayed beautifully and securely.
Materials You’ll Need
- Hammer
- Nails or picture hooks
- Screws
- Spirit level
- Tape measure
- Pencil
- Drill
- Cord/wire
- Wall anchors
- Optional: stud finder
Step 1: Choose the Right Spot
The first step is selecting the perfect location for your picture frame. Consider the room’s layout and the wall space available. The centre of the picture is recommended to be at eye level, which is typically around 57 inches from the floor. This general rule ensures all pictures are positioned in a cohesive and aesthetically pleasing way, no matter the setting.
Step 2: Prepare Your Tools
Gather all the necessary tools and materials listed above. If you’re hanging a heavy frame, consider using a stud finder to locate a stud in the wall for extra support – this is particularly important when fixing to plasterboard. It is also important to ensure there are no cables or pipes in the location.
Step 3: Mark the Wall
Hold the frame against the wall and use a pencil to mark the top centre of the frame. Measure the distance from the top of the frame to the hanging point (usually a wire, hook, or sawtooth hanger on the back of the frame). Then, measure this distance down from the mark on the wall to determine where to place your nail or hook. Remember: if you’re using cord or wire, there will be some slack so you will need to take this into account too.
Step 4: Fix the Nail or Hook
Lightweight Frames
If you’re using a nail or hook, gently hammer it into the wall at the marked spot.
Heavyweight Frames
For heavier frames, drilling a pilot hole and inserting a wall anchor before screwing in the hook is advisable for additional support. Typically rawl plugs are the best choice, providing a strong base for the screw or nail to be inserted into.
Step 5: Hang and Level the Frame
Carefully hang the picture frame on the nail or hook, and use a spirit level to ensure the frame is straight. Adjust if necessary.
Step 6: Final Adjustments
Step back and look at the frame from different angles to make sure it is positioned as you desire. If needed, move the frame slightly to get the perfect alignment.
Tips for Hanging Multiple Frames
For those who wish to create a gallery wall, here are some of our top tips to guarantee that it looks great!
- When hanging a collection of frames, lay them out on the floor first to decide on the arrangement. This helps to avoid those unwanted holes!
- Maintain a consistent space between frames, typically 2-3 inches.
- Keep a balance in the visual weight and colour distribution between the frames.
Safety Precautions
- Always use appropriate safety gear like gloves and goggles when drilling.
- Ensure that children and pets are at a safe distance whilst you are mounting the frame.
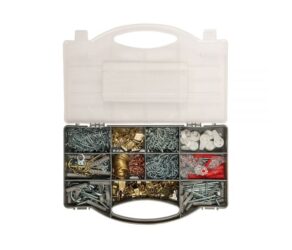
Here at BS Fixings, we like to make your DIY tasks as simple and as easy as possible by providing a fantastic range of products, including this Fixman Picture Hanging Pack. This 545-piece set is designed to meet all your picture hanging needs, containing an assortment of nails, screws, picture hooks, and wall plugs, ensuring that you have the right fixings for any type of wall or frame size. With this convenient set, you can confidently hang your cherished photos, artwork, or mirrors without the worry of not having the right products. Shop the pack below!
Please feel free to browse the rest of our website for some great deals on fixing and fastening products. For those who would like to find more information or require help, don’t hesitate to get in touch on 03330 117818 or email [email protected] and a member of our team will be happy to help.