Wall ties play an important role in the structural integrity of buildings, often going unnoticed yet essential. These hidden elements help to ensure stability in cavity walls by improving their overall strength. In this blog, we’re going to focus on helical remedial wall ties, a specific type that is vital for the maintenance and safety of existing structures. These ties have become increasingly important in both new construction and the refurbishment of existing buildings, ensuring safety and longevity.
What Are Helical Remedial Wall Ties?
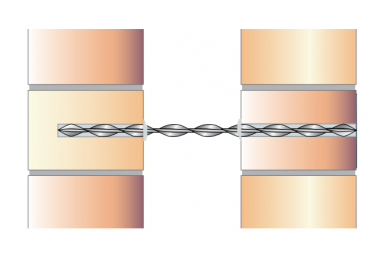
Helical wall ties, distinct from traditional flat or strip ties, are modern fastening products used in masonry work. Characterised by their unique spiral design, these ties are made typically from stainless steel, providing high tensile strength and durability. They differ from traditional ties in their method of installation and load distribution. Unlike traditional wall ties, helical remedial ties can be installed with minimal disturbance to the existing structure, making them ideal for repairs and reinforcement work. Their importance in maintaining the structural integrity of buildings, particularly in renovations and restorations, is paramount.
When to Install Helical Remedial Wall Ties
Recognising the signs of wall tie failure is crucial to ensure your building does not collapse. Such symptoms include horizontal cracking at regular intervals in the mortar, bulging or bowing walls, and lifting of roof edges. Timely installation of helical wall ties is imperative to prevent further damage and maintain structural integrity. Delaying this can lead to severe structural issues and even pose safety risks.
Step-by-step Installation Guide
Tools and Materials Needed:
- Helical remedial wall ties
- Hammer drill and suitable drill bits
- SDS drill adapter or tie driving tool
Installation Process:
- Preparation: determine the spacing and depth for the helical ties based on the wall’s condition and type.
- Drilling: using a hammer drill, create pilot holes at the marked locations, ensuring they are of the correct depth and angle. Drill through both layers of the cavity wall, ensuring the hole matches the required diameter and length. Generally, the hole should be 10mm deeper than the length of the tie that is being installed.
- Inserting Ties: attach the helical tie to the SDS drill adapter or use a tie-driving tool. Carefully screw the tie into the pilot hole until it reaches the required depth, ensuring it is fully anchored into the masonry. You should continue driving the tie until the setting tool pushes it slightly below the surface of the wall.
- Finishing: following this, detach the driver and conceal the entry point with a carefully applied, colour-matched mortar, firmly compacted to blend seamlessly with the surrounding area.
Safety Precautions:
- Wear protective gear, including safety glasses and gloves.
- Ensure stable footing and safe use of ladders or scaffolding.
- Follow all manufacturer guidelines and safety instructions.
After Installation: Checking and Maintenance
After installation, inspect the ties to ensure they are in the correct position and secure. Regular maintenance checks are recommended to monitor the condition of the ties and to identify any potential issues early.
The correct installation of helical wall ties is essential in ensuring the structural stability and safety of buildings. These modern solutions offer an efficient and reliable means of reinforcing masonry structures, particularly in restoration and renovation projects. At BS Fixings, we are committed to providing high-quality helical wall ties and expert advice. For further guidance, products, or support, do not hesitate to contact us!