Renovating your home or undertaking a DIY project has never been easier, thanks to UniBond’s No More Nails adhesive. This powerful, heavy-duty construction adhesive offers a robust alternative to traditional fastening methods, removing the need for nails or screws in many projects. Its high-strength, water-resistant formula makes it suitable for adhering wood, ceramic, metal, brick, and most plastics. Plus, as it dries clear, it can also be used to fill in gaps on uneven surfaces and is paintable for a seamless finish. If you want to add No More Nails to your toolkit but don’t know how to use it, you have come to the right place! Below, we offer an updated guide on how to apply No More Nails for both beginners and experienced builders, with some tips and tricks to help you along the way.
Preparing the Surfaces
Before you begin, ensure that the surfaces to be bonded are clean, dry, and free from grease, dust, or any flaking paint. Surfaces should be lightly sanded if they’re painted, removing any loose paint and dust afterwards. It is also important to check that the surface temperature is below 30°C to prevent the adhesive from degrading due to heat exposure, especially when working outdoors or on dark-coloured surfaces.
Applying the Adhesive
For the best results, spread a 4-6mm bead of adhesive onto one of the surface, using a cartridge or extrusion gun. Make sure to space the beads no more than 45cm apart for even distribution. If working with butt joints, apply the adhesive on both panel edges.
Tip: if adhering to wide surfaces, apply the adhesive in a zig-zag pattern for a higher initial tack.
Choosing the Right Application Method
Two-Way Contact Method
Ideal for ensuring maximum adhesion, apply the adhesive, press down firmly to transfer it between surfaces, and then separate them briefly. Allow the adhesive to become tacky for 3-5 minutes before rejoining the surfaces. Ensure firm contact by tapping the area with a hammer.
One-Way Stick Method
Recommended for heavier panels, this method involves applying the adhesive, bringing the surfaces together, and securing them with clamps, nails, or screws to maintain contact. Mechanical fasteners can be removed after 24 hours for temporary fixtures but should be left in place if the bonded areas are subject to strain.
Drying Time
Depending on the materials, ambient temperature, and humidity, the adhesive requires between 24-48 hours to achieve maximum bond strength. It’s advisable to support heavier items with additional fixings during the drying process.
Common Mistakes and How to Avoid Them
A common mistake is applying too much adhesive, which can cause oozing and an extended drying time. To avoid this, apply a thin layer and ensure that the surfaces are pressed together tightly. Another oversight is not allowing the adhesive to cure properly before subjecting it to weight or stress. Always refer to the product's instructions for the recommended curing time.
Project Ideas and Inspiration
No More Nails adhesive is ideal for a variety of projects, from mounting decorative items to heavier construction tasks. Use it to affix panelling, install crown moulding, or even for outdoor applications like securing stone veneer—just ensure the adhesive is suitable for exterior use and the weather conditions. The versatility of No More Nails provides a reliable solution for creative and structural projects alike.
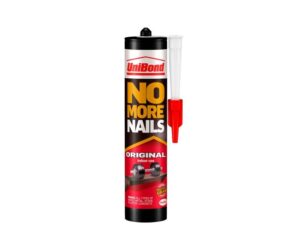 Unibond No More Nails
Original Grab Adhesive Cartridge 365g
SHOP NOW
If you would like to find more information or have any questions about our products, please feel free to contact us on 03330 117818 or email [email protected].